Showing posts with label gimp. Show all posts

Saturday, October 16, 2010

Tryst with HDR on Linux


Another delightful experience with Ubuntu and opensource in general.

I had been to a Raigad trip recently, and had got some pics in my DSLR. On checking out the photos, I realised I had couple of genuine cases for trying out HDR technique. Unfortunately, for each of the cases, I had only one image, and not an exposure-bracketed set of three images, as is usually required for composing an HDR image. Yet I had to try something. So what I did was to prepare three (virtually) exposure-bracketed copies from the same RAW image through ufraw, and thou
ght of feeding them into some HDR software.

Having those three differently exposed images in hand, allowed me to start looking for an HDR software for Linux. It's sometimes disappointing to see lots of such softwares are created mainly for the Windows platform, or sometimes for a Mac. An example would be the popular one - Photomatix

On my previous Ubuntu (Jaunty), I had this Qtfpsgui software. But it didn't appeal, and confused me a bit. Besides, it requires K-Desktop libraries, which would take quite some time for download and installation. So I kept searching for an alternative. And this is when I chanced upon this software called - Enfuse. It's available as part of the Enblend software pack for Linux, and is there in the Ubuntu repository. So all you need to do, to install it, is to type "sudo apt-get install enblend" in the terminal and press enter!! I got it installed
on my Lucid Lynx setup.

In addition to Enfuse and Ufraw, I used one enfuse_raw.sh script mentioned on this page
. That script uses ufraw in batch mode to expose a RAW file using different exposure compensation levels. It then uses enfuse to combine those images into an HDR image. So all you have to do is - to feed your RAW file to the enfuse_raw.sh script and specify how many different expousures to process/extract from the RAW file, for combining into an HDR. Run the command, wait for maybe couple of minutes, and bingo! Your HDR image is ready.

Here, check these few images after they were processed into HDR using ufraw-enfuse combo on Linux. To emphasise how HDR has impacted the image details, against mere exposure adjustments, I have prepared a collage of each HDR (big size) surrounded by exposure adjusted images (thumbnails). I am sure you will appreciate what a fine job Enfuse does.

1. Varandha Ghaat:
The mountain on the left side is in dark shadows. You increase the exposure, the details in the shadow become clearer, but the sky and the area in sunlight blows out. Decrease the exposure, skies and the area in the sunlight is detailed but details in the shadow are gone. Enter HDR.


2
. Shivaji Maharaj:
Similar case here. Increase the exposure to get details in the statue, and you end up blowing up the blue sky white. Decrease the exposure, get a cool blue sky, but the statue appears as a silhoutte. Now check the HDR.


3. Varandha Ghaat (again):
Same dilemma. Left side area is in dark shadow, while the right side area is in bright sunlight. Camera doesnt know how to balance. Hire HDR.


Summary of what I did:
1. Install enblend and ufraw - "sudo apt-get install enblend, ufraw"
2. Get the enblend_raw.sh script from this page - http://ubuntuforums.org/showthread.php?t=741161
3. Feed the RAW file to the script. e.g. "./enfuse_raw.sh my_snap.raw -3"

Time to marvel at what you can quite easily achieve using opensource, without spending a penny. *Legally*.

Sunday, March 21, 2010

Little fun with GIMP

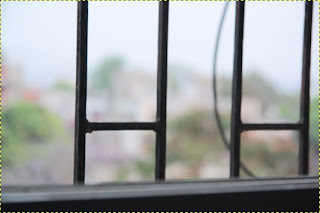
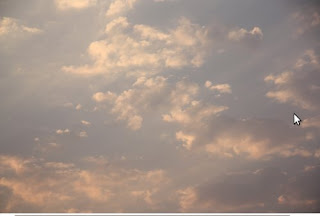
After buying a new Canon EOS 450D along with EF-S 17-85mm f/4-5.6 IS USM lens, it was but obvious for me to waste clicks at whatever I could point the camera at. So I clicked. And luckily got few interesting images with it. Interesting - from my perspective; ofcourse. Anyways. One of the image was of an evening sky just around/after sunset; and the other was of my window - the result of my attempts to get a smooth bokeh.


After seeing the images, it struck me that the combination was almost an invitation to try some simple but cool photoshop techniques on. So, the aim was to replace the blurred background of the window, with the sky; i.e. as if the evening sky was captured from the window (with small aperture setting). Here is what I achieved finally -


Pretty cool huh? If you are new to photoshop techniques, I am sure, it impressed you. ;)

And this was done using what? Some costly softwares like Photoshop? Nah! It was all an open-source affair.

Removed the SD card from camera. Inserted into my laptop, which is running Ubuntu Jaunty 9.04. Imported the card contents on my laptop using F-Spot photo manager (used like photoshop-bridge software). Opened the chosen images from F-Spot, into GIMP - another super-powerful opensource software which gives photoshop a run for it's money. That too for free!!

Here is how I achieved the final result -
  1. Open window.jpg in GIMP (through F-Spot photo manager, which has thumbnails of all recently imported photos)
  2. Create a duplicate layer from the window layer, and bring the duplicate layer in the front. Let's call it a maskImage.
  3. De-saturate the maskImage layer (Colors->Desaturate) and apply threshold transformation (Colors->Threshold)
  4. Adjust the threshold such that you get an outline of the black window-bars. Use the eraser to rub out unwanted black spots from the image.
  5. The final maskImage looked something like this -
  6. Then drag the sky.jpg image from F-Spot photo manager, and drop it on GIMP window. GIMP will add it as a new layer. Let's call it a sky-layer.
  7. Right click this new sky layer, and click Add Layer Mask. Keep the mask fully opaque (white).
  8. Now go to the maskImage layer and select all of the image (Select->All). Copy it (Edit->Copy)
  9. Select the layer-mask added the sky layer. There should be a white box around the layer-mask.
  10. Paste the selected maskImage (Edit->Paste)
  11. It will show up as floating paste layer. Now go to Layer menu and select Anchor Layer option.
  12. If everything works fine, the layer-mask of sky-layer will now have the maskImage as it's contents.
  13. Now make maskImage layer invisible, and keep rest of the two layers (sky-layer and window-layer) visible.
  14. Make sure sky-layer is on top of window-layer.
  15. And that's it! Now go back and check the final-image above, once again. Sweet fruit all these efforts!
This again shows the power and reach of opensource technology, where there is a tool for every need, however complex the need may be.

So kudos again for all those freedom-loving wizards taking efforts to create awesome tools like GIMP which are an amazing replacement for as costly a software as Photoshop.

Really difficult to imagine a life without opensource.


[Reference: How to use an image/layer as a layer-mask]